This post may contain affiliate links. Please read my affiliate disclosure for more information.
Building an online shop can be difficult. You want to use both Shopify and WordPress, yet it’s hard to find the solution.
In this tutorial, you’ll learn exactly how to integrate Shopify for WordPress and why it’s an excellent combination for your online business.
Why Use Shopify for WordPress?
The benefit of using Shopify for WordPress is that you’re able to effectively utilize the best parts of both Shopify and WordPress.
WordPress excels at content marketing and SEO, while Shopify is best for building your eCommerce store and selling products.
If you want to learn how to sell your Shopify products on your WordPress website, then this tutorial is for you!
How To Integrate Shopify for WordPress
Before we go into how to set everything up, there are two different ways you can set up Shopify for WordPress.
Option #1 – Use the Shopify Buy Button on WordPress
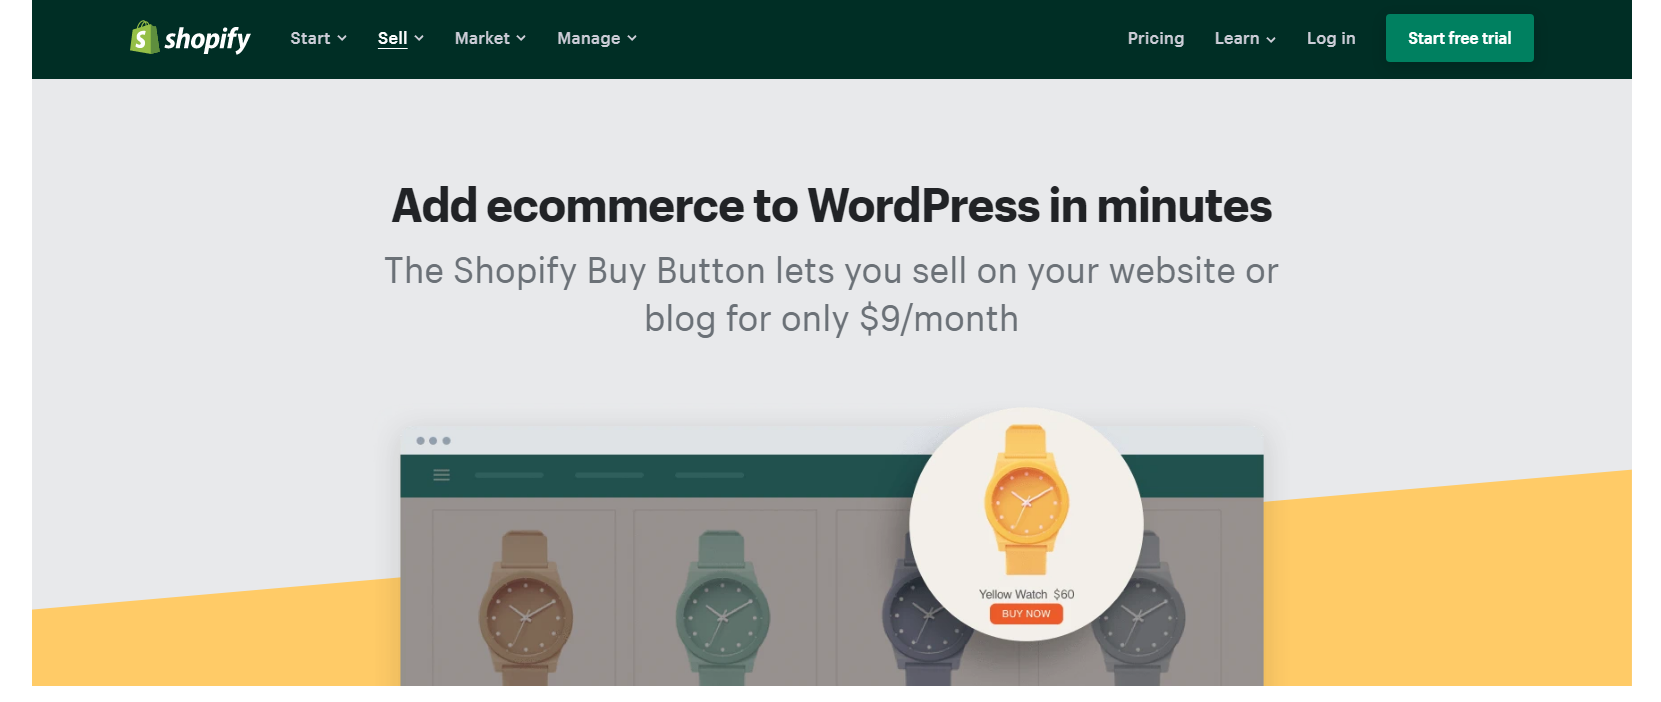
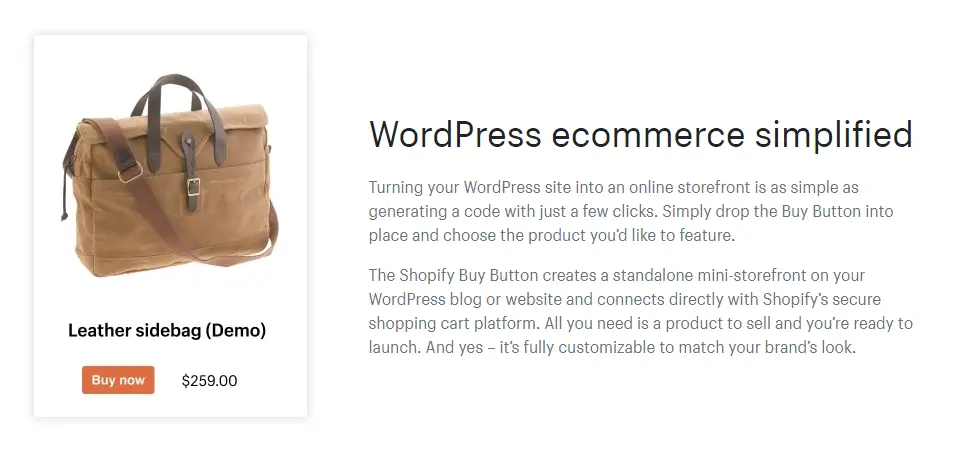
The Shopify Buy Button allows you to add a Shopify buy button or add to cart button and embed it inside your WordPress website or blog for $9/month.
You’re able to process customer transactions without them leaving your site.
All you do is copy the HTML code that Shopify gives you and you’re ready to launch. It’s fully customizable as well to match your branding.
This route is much simpler if you’re less technically savvy or only want to embed a few products on a few pages. It’s also a bit cheaper if you only want basic functionality to sell your products through Shopify on your WordPress website with the buy buttons.
One downside to this method is that you don’t have an entire dedicated eCommerce storefront and online shop.
If instead, you want to go all the way with an entire storefront, continue on to option number two.
Option #2 – Connecting Shopify and WordPress

In this option, we’ll be setting up WordPress on your primary domain:
yourdomain.com
Then, your Shopify eCommerce store will live on the subdomain:
shop.yourdomain.com
Alternatively, you can go with “store.yourdomain.com”, whichever you prefer.
This allows you to build out an entirely different website under a subdomain in your hosting and integrate the two platforms under one root domain.
First off, to get started you’ll need to sign up with WordPress and Shopify:
Step 1: Sign up for your WordPress hosting and FREE domain

Bluehost is the hosting provider we’ll be using for the WordPress install. There are a variety of other options out there, but Bluehost is the one that I personally recommend.
One thing to note is that when using WordPress, you must on the WordPress.org version. You do not want to use WordPress.com. This is a common misconception and something I ran into as well.
If you’re a beginner you want to avoid making this mistake when setting up your site. WordPress.org is the self-hosted version you want and you’ll be all set if you get started with Bluehost.
They also include a FREE domain for the first year, along with a FREE SSL certificate.
Step 2: Start Your FREE 14 Day Shopify Trial

Shopify is of course the eCommerce solution for this tutorial. However, in theory you could use this same process for any other eCommerce platform.
Pricing for Shopify and WordPress
Shopify is $29 per month, and WordPress is $3.95 per month (on the special Bluehost intro offer).
For the first year this comes out to a grand total of about $395.
Step 3: Setting up the Subdomain for Your Shop
To get your “shop.yourdomain.com” Shopify subdomain ready to go on your WordPress site, you’ll need to go to Domains > Subdomains on your hosting provider.
Keep in mind that this may look different for you depending on your host.
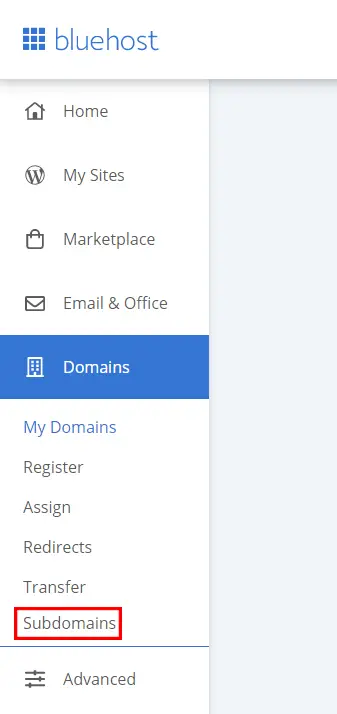
Once you reach the subdomains page, all you do is type in and create your preferred subdomain:
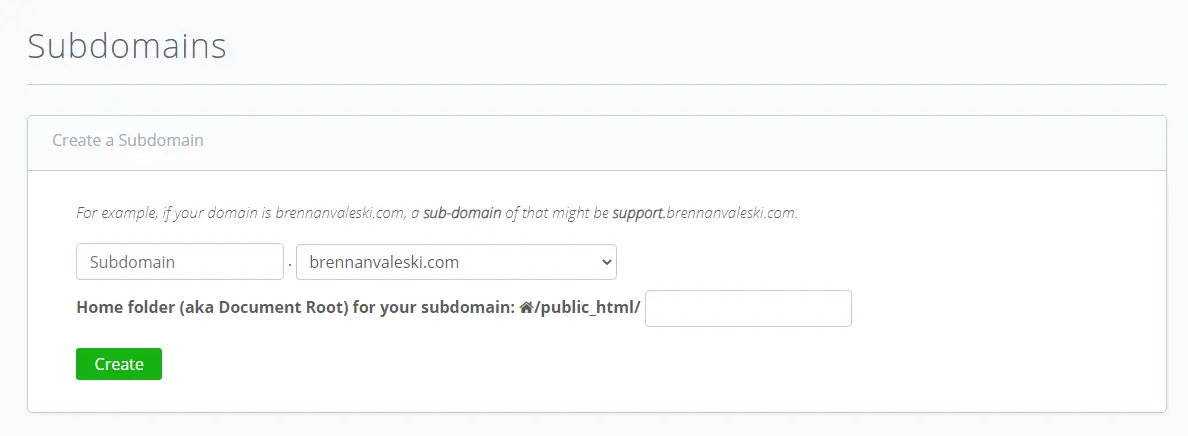
Type in your preferred subdomain name such as shop, store, etc and then click the create button.
Step 4: Adding the DNS Records
This next step is a bit more tricky. You’ll need to open your Zone Editor to change the DNS (domain name system) settings:
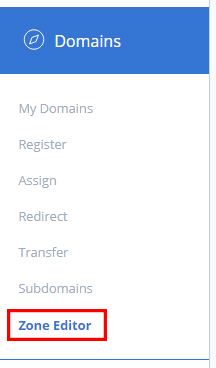
(FYI: The Zone Editor link only shows up in the navigation on Bluehost after selecting the Subdomains page)
Next, you’ll see this page:
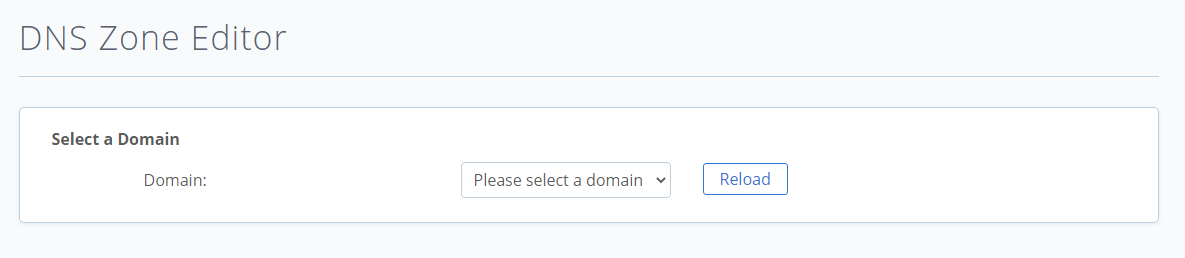
After you select your domain, then you’ll need to edit and make sure that under the settings that each show:
- ANAME (@ pointing to the IP address of the WordPress host)
- CNAME (host record “shop” subdomain name pointing to “shops.myshopify.com”)
The CNAME “www” should be pointing towards your WordPress host since that will be your main domain.
Conversely, you could use your Shopify store as the main domain, and place your WordPress site as the “blog”.
Keep in mind that when editing your DNS settings, it can take anywhere from 24 to 48 hours for the changes to fully propagate.
Step 5: Editing Shopify DNS Settings
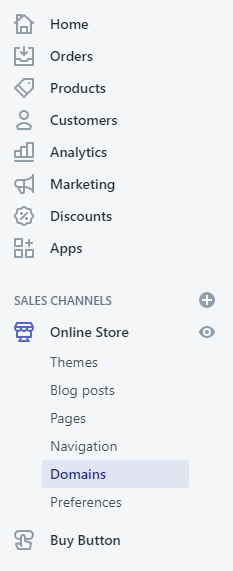
The next step is to edit the Shopify DNS settings to make sure they match your WordPress host DNS settings. Go to the Shopify dashboard > Sales Channels > Online Store > Domains:
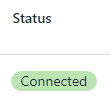
Next, you’ll view your domain settings. Make sure both your primary domain (shop.yourdomain.com), and Shopify-managed domains such as (yourdomain.myshopify.com) show the “connected” status:
If not, you’ll want to refer to these articles from the Shopify help center:
Once again, after modifying your WordPress’s Bluehost or Shopify DNS settings, it may take between 24 to 48 hours for the information to propogate.
It can be much quicker though, sometimes even within the hour.
To Conclude
All in all, this is how you connect Shopify for WordPress. You can go the simple route with the Shopify buy button, or you can use the subdomain method.
This way, you can host your content marketing through your WordPress site, and then send visitors over to your Shopify store all within the same domain and branding.
If you run into any unique problems along the way, then I’d recommend contacting the support team of your hosting provider, Bluehost, or Shopify for additional help. They can typically point you in the right direction.